Use Google Public DNS in Android or iOS
Android Version
For Android, to start, you are going to need an app called SetDNS that will help you modify your current servers. The app is free and can be obtained from the Google Play.
- Head over to the Google Play and install the SetDNS app.
- Launch the app from your device’s App Drawer.
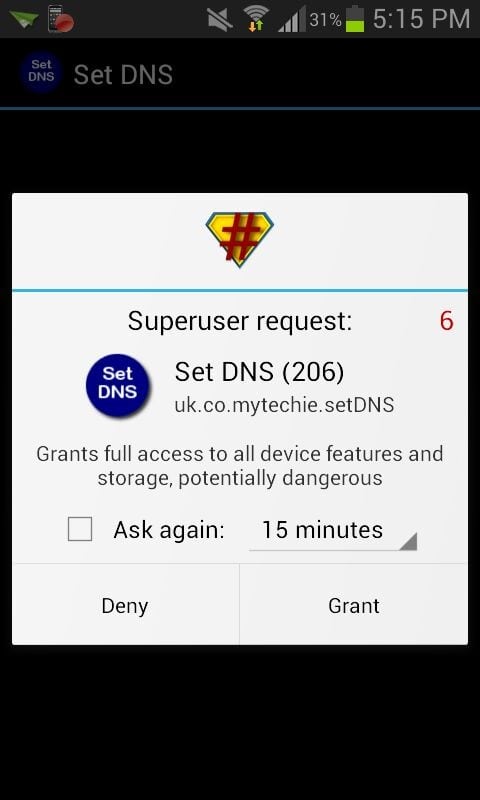
- When you launch the app for the very first time, it will ask you to grant the Superuser permission. To do so, simply hit the “Grant” button and you should be good to go.
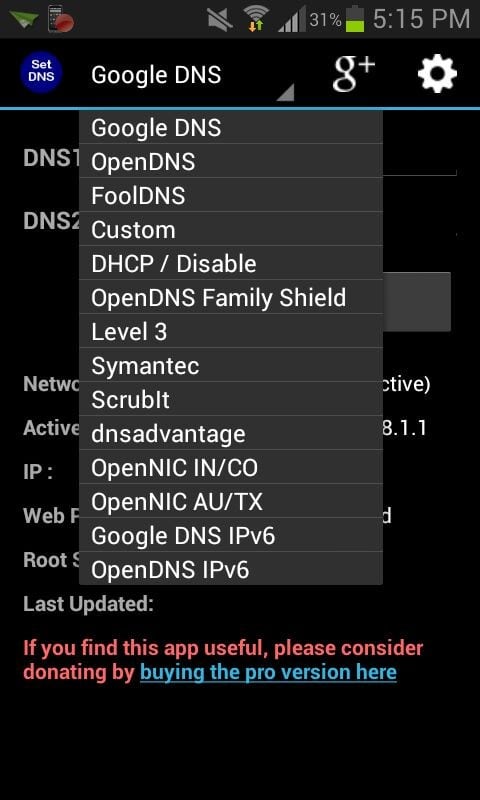
- On the next screen, tap on the dropdown menu given at the top, and it should list out all the different Domain Name Servers available for you to use.
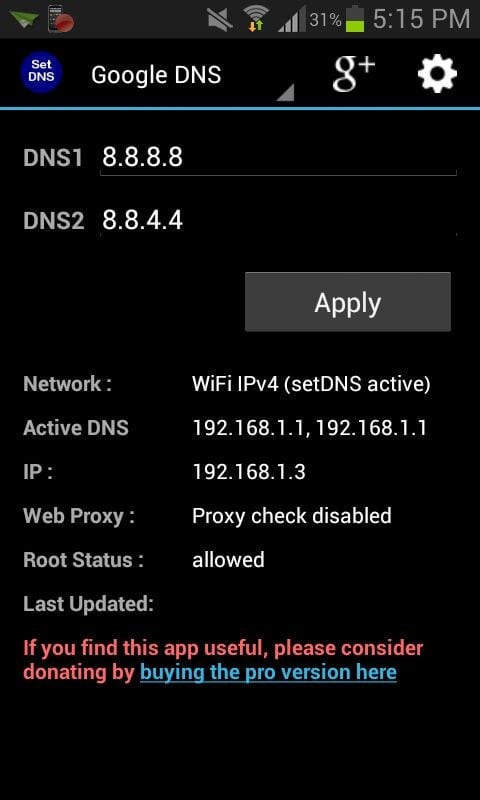
- As an example, we are going to be using the Google DNS. Choose “Google DNS” from the dropdown menu, and your screen should look like following image. Tap on the “Apply” button, and the selected servers will be applied on your device.
- Similarly, you can choose OpenDNS from the dropdown menu and hit “Apply” to make it work with your device.
- You are done.
- Enjoy and try “www.sarawakreport.org“
iOS Version
In this example we’ll set our iOS device (iPhone, iPad, etc.) to use Googles DNS servers (8.8.8.8 + 8.8.4.4).
This gives a potential increase in speed – note that this can only be done when using WiFi connection.
Open up the settings on your iOS device and navigate to the WiFi settings.
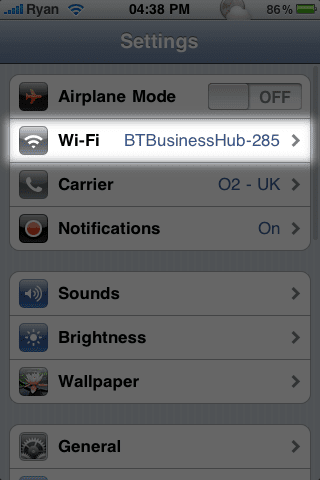
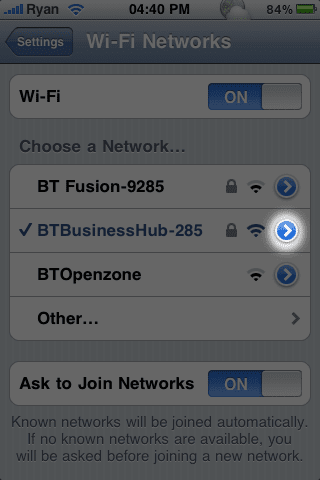
Select the WLAN network you’re connected to and tap the blue arrow next to it.
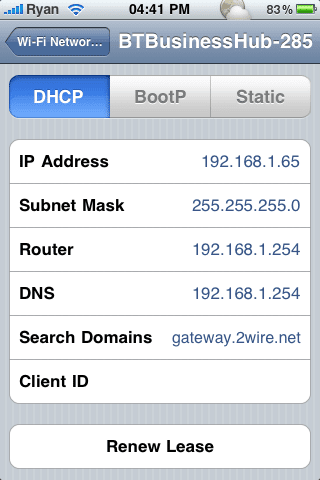
Here, change the DNS settings to Googles DNS servers by tapping on the line “DNS”
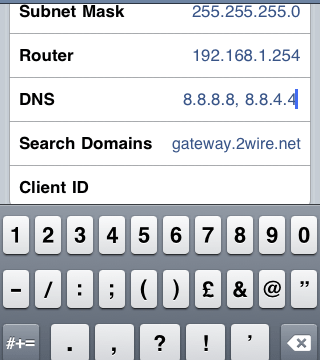
In this DNS field, enter 8.8.8.8, 8.8.4.4
(comma and space are important!)
Go back to previous screen and press the Home button.
You are done. Enjoy and try “www.sarawakreport.org”
For PC, read here: http://wp.me/p5pbtl-5J

Pingback: Access "sayakenahack.com" from Malaysia - iamJayChong